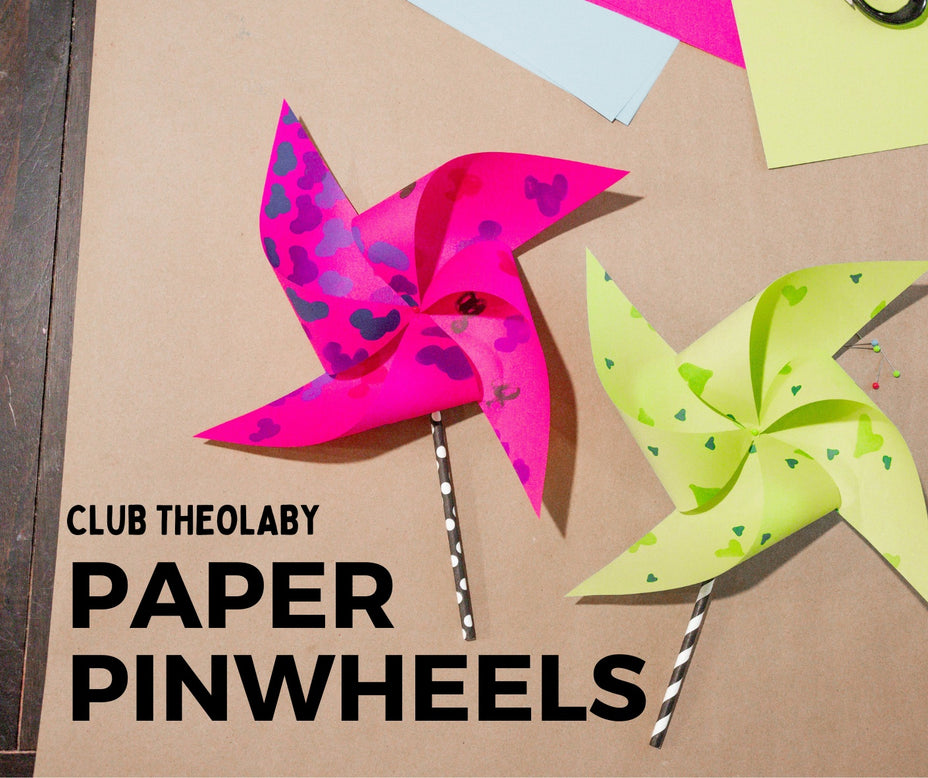
Today we’re putting together paper pinwheels using colored paper and paper straws. Not only is this a fun craft for kids of all ages, but it also gives us an opportunity to talk with them about the Holy Spirit! Just like we can't see the wind but can witness its effects on the pinwheel, we can experience the evidence of the Holy Spirit in our lives.
SUPPLY & TOOL LIST:
- Colored paper (you can also use plain printer paper and let your child color it beforehand!)
- Paper straws
- Scissors
- Straightedge or ruler
- Pencil
- Pushpin
- Hot glue gun
- Needle nose pliers
But the fruit of the Spirit is love, joy, peace, patience, kindness, goodness, faithfulness, gentleness, self-control; against such things there is no law. - Galatians 5:22-23
Step 1: Prepare the Workstation
Lay out all the supplies and tools within reach on a clean work station. We also like to put down brown kraft paper any time we’re using markers or glue to make clean up easier!

Step 2: Cutting the Paper
Take a sheet of colored paper and cut it into a perfect square. A size of 6x6 inches or larger works well for this craft. Help your child with the cutting if needed.
Pro tip: Use the short edge of another piece to help you know how much of the longer edge to cut.
Step 3: Decorate the Paper
Encourage your child to use their creativity to decorate the square paper. They can draw patterns, write inspiring words, or even create a colorful design using markers or colored pencils.

Step 4: Knowing Where to Cut
With the decorated side facing down, use a straightedge to draw an X from corner to corner. Add a dot in the center where the X meets, and one on the right side of the line in each of the 4 corners. Then make a mark along each line about 2 inches away from the center mark (this measurement doesn’t have to be exact, but try to make the mark equal on each of the 4 lines).

Step 5: Cutting
Make diagonal cuts from the outside corner toward the center of the square stopping where you made the mark, leaving about two inches uncut in the center. Repeat this process on each side of the square. Then, use a push pin to poke through each of the 5 marks you made (one in the center and one in each of the 4 corners).

Step 6: Assembling the Pinwheel
Use your needle nosed pliers to make a 90° bend in the middle of your push pin needle. Poke this pin through the hole in one of the corners and then add each additional corner going in a clockwise direction. Once all four corners are on the pin, poke through the center hole and your paper straw, ensuring that all materials are on the other side of the 90° bend you made.

Step 7: Glue the Pin in Place
Rotate the pin so it is parallel to the straw. Hold the pin flat against the straw and add a small bead of hot glue to keep it in place.


Once the pinwheel is assembled, take a moment with your child to observe how it spins when you blow gently on it. Note how we can't see the wind itself, but we can see its effects through the movement of the pinwheel. Similarly, the Holy Spirit may be unseen, but we can witness His effects in our lives through the fruit of the Spirit mentioned in Galatians 5:22-23.


Craft-Time Conversations
Here are a few simple conversation starters you can use to discuss the Holy Spirit while you build your pinwheels together!
- Can you think of a time when you felt the presence of the Holy Spirit in your heart?
- What are some ways we can show others how the Holy Spirit works in us through the fruit of the Spirit (love, joy, peace, patience, kindness, goodness, faithfulness, gentleness, self-control)?
- How can we ask the Holy Spirit to guide us and help us make good choices?
As you have fun with your pinwheels, remind your child that God’s Holy Spirit is always with them and wants to help them in their every day!